FB50 step by step: Posting Journal vouchers
Source
The FB50 transaction is very similar to the FV50 (Park G/L Document), FB60 (Enter Invoice), and FV60 (Park Invoice) transaction, and the steps shown here can also be used for those transactions.
Record
- Start Winshuttle Transaction from the desktop shortcut or from the Windows Start menu.
- Click New.

- Enter transaction code FB50 in the Transaction Code box, and then click Go.
 An SAP Log On screen appears.
 - Click the SAP system that you want to use, and then click OK.
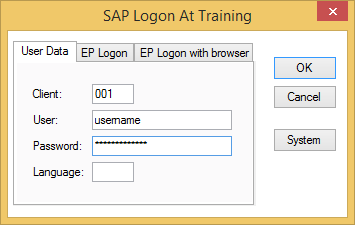
- Enter the appropriate User Data in the SAP Logon window, and then click the OK button.
 If you do not see the SAP system that you want, click the System button and choose a different system.
 - For the recording mode, click Non-Batch Input Mode and click Without SAP Controls.
 Note: For most transactions, Batch Input mode will suffice, but for downloading information from SAP transactions, or for Finance or HR transactions in which there are Dynamic Actions executing or user parameter values being used, Non-Batch Input mode will be necessary. The distinction of Without SAP Controls and With SAP Controls is just a matter of what tools are on the transaction screens.
 - Enter any additional properties in the appropriate fields.
- To prevent people from editing the script, check the Lock TRANSACTION script box. This will password-protect the script, preventing anyone from changing it.
- Click the Next button.The FB50 transaction starts.Note: The following screens may vary according to the way your SAP system has been configured.
These differences will be identified throughout the rest of this document. - Enter the company code and click the green checkmark button.
- Enter data into the header section of the screen. In this example:
- Document Date
- Posting Date
- Currency
- Reference
- Doc. Header Text
- Document Type

- Press the Enter key.
- In the item section, enter data for the first line item:
- G/L Account number
- Debit/Credit Indicator
- Amount
- Cost Center/Profit Center
Important: These steps will most likely be different from manual entry. - After you enter all of the data for the line, select and highlight the row.
- Press the Insert Row button to insert an empty row above the current row.

- Now fill in the newly inserted line on top with the data for the next item, and then press the Enter key.
 Important: While recording this transaction, pay close attention to the running balances of the debit and credit entries. The transaction balance indicator must be green at the end of the recording.
 - Click Save to save and exit out of the transaction. This will also end the recording.

- When SAP notifies you that the document was posted, click the green checkmark button.
To make this process repeatable by Transaction, there will be a few changes to the process compared with how you would manually create a material. These differences will be identified throughout the rest of this document.
Map
It is now time to create the mapping for this transaction. Mapping a script is just a matter of connecting SAP fields to fields in your data file. Transaction provides a Mapper to facilitate this process.
Auto Mapping will map the entire script to an Excel spreadsheet and in order. Because of the complexity of this transaction, we will choose the Create Mapping option instead.
- In the Map pane, click Create Mapping.

- Transaction opens the Expert tab of the Mapper.In each of the rows of the Mapper, you will see:
- Mapper Row number: This is just a reference number.
- Enable flag: only enabled Mapper rows will be executed by Transaction.
- Screen / Screen Number: Technical screen information from the recorded transaction.
- Field Description: The label associated with the SAP technical field name.
- Field Name: The SAP technical field name.
- Mapping Type: Fixed Value, Excel to SAP, SAP to Excel (or, if mapping to Access: Access to SAP, SAP to Access).
- Value: Values assigned to the SAP field; either fixed values or values to or from the assigned data source.
- Notes: Freeformat notes to provide useful information to runners of the Transaction script.

- In the Data Source Preview section, you will see a preview screen of the selected data source.To change the Data Source, click the Change Source Type link at the top of the Expert Tab. This displays a drop-down box to switch to Microsoft Access.
 The Preview section will also change to reflect the choice. In this case, we will use Excel.
Disable duplicate fields
As you can see, the line item data for G/L Account number, Debit/Credit, Amount, and Tax Code repeat again on the next screen because in our recording we entered two line items.
We do not need these fields to be enabled, because in the next step we will insert a loop to allow uploading multiple line items.
To disable the duplicate fields:
- Select the rows by clicking in the gray area on the left and dragging down until the selection is highlighted.
- Right-click and select Disable Fields from the menu.

The Enable checkbox should now be unchecked and the fields disabled.
Add the loop
To allow the Excel spreadsheet to contain data for multiple line items, we will insert a Loop around Mapper rows containing the Item data for G/L Account number, Debit/Credit, Amount, and Tax Code.
- Highlight the rows for the entire line item, in this case rows 12 through 19.

- Click the Loop button.
- The Do While Properties box opens with default values, which can be overridden.
- The start and end row refer to the rows in the Mapper that contain the loop (the highlighted rows—in this case, 12 through 19).
- The MS Excel ID Column box displays the column in the spreadsheet that will contain the Header and Detail (line item data) identifiers.
- The Header ID and Line Item ID displays the values that will identify the Header (H) and Line Item (D) rows.

- Click the OK button to insert the loop around the selected Mapper rows.The Mapper reflects the following changes as a result of inserting the Loop:
- The graphical depiction of the loop around the selected lines indicates which Mapper rows will be contained within the loop.
- The ID Column has been identified in the Preview screen.
- Row 2 contains the first Header ID value and Row 3 contains the Line Item ID value.

Map and save the script
- To map the script to the data source, you will drag in the direction that the data will move. For this script, you are uploading data from Excel to SAP, so you will drag from Excel to the Mapper.Drag column B up and drop it onto row 5.Continue across the Excel preview by dragging column C up and dropping it onto row 9, column D up to row 10, and columns E and F up to row 11 and 12, respectively.

- The next step is to save the script file (.TxR) and the Excel preview file (.xlsx). Click the Back arrow button at the top on the File menu.
 The best practice is to name the Excel spreadsheet the same name as the script unless an Excel spreadsheet will be used for multiple scripts.Note: If you want to use an existing Excel file that already has the data set up, you can skip saving the preview file and save the script file by clicking the Save button on the File menu.
 - Transaction prompts you to save the Excel preview file.

- Click Yes, and then enter the Excel file name.
- Transaction prompts you to save the script.

- Click Yes, and then enter the script’s name.
Add the data
Transaction loads the Run pane.
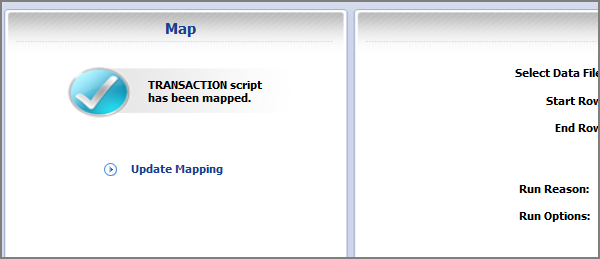
If necessary, you can navigate back to the Mapper by clicking the Update Mapping link on the Map pane.
- Click the Excel icon to the right of the Select Data File box. This will open the mapped Excel file that is listed in the Selected Data File box.
 Note: Transaction will automatically assign the Log column to the next available column after the last mapped column (in this case, column J).
 - Type the data in the columns, including the Header and Line Item identifiers in the ID Column, and then save the Excel file.
 After you enter the data into the Excel spreadsheet, you can run the script.
Run
Back at the Transaction Run pane, you can specify a start and end row, specify the Excel sheet that contains the data, and change the Log column.
- To execute the upload, click the Test button, if you are a Central user, or click the Run button if you are not a Central user.
- In the SAP Logon window, if necessary, click the System button to select the appropriate SAP system.
- Enter the appropriate user data, and then click OK.The Journal Entry will now be created based on the data in the spreadsheet.
- In the bottom left corner, Transaction displays a message when the run has finished.
- Open the Excel sheet and check the log column. The run was successful and the messages returned from SAP were entered into the log column.
